Master Your Pi: Seamless Remote Access With RemoteIoT
In an increasingly connected world, the ability to manage devices remotely has become not just a convenience, but a necessity, especially for those delving into the vast possibilities of the Internet of Things (IoT) with their Raspberry Pi. The concept of remotely access Raspberry Pi RemoteIoT tutorial is at the forefront of this revolution, empowering users to control their tiny but mighty computers from virtually anywhere.
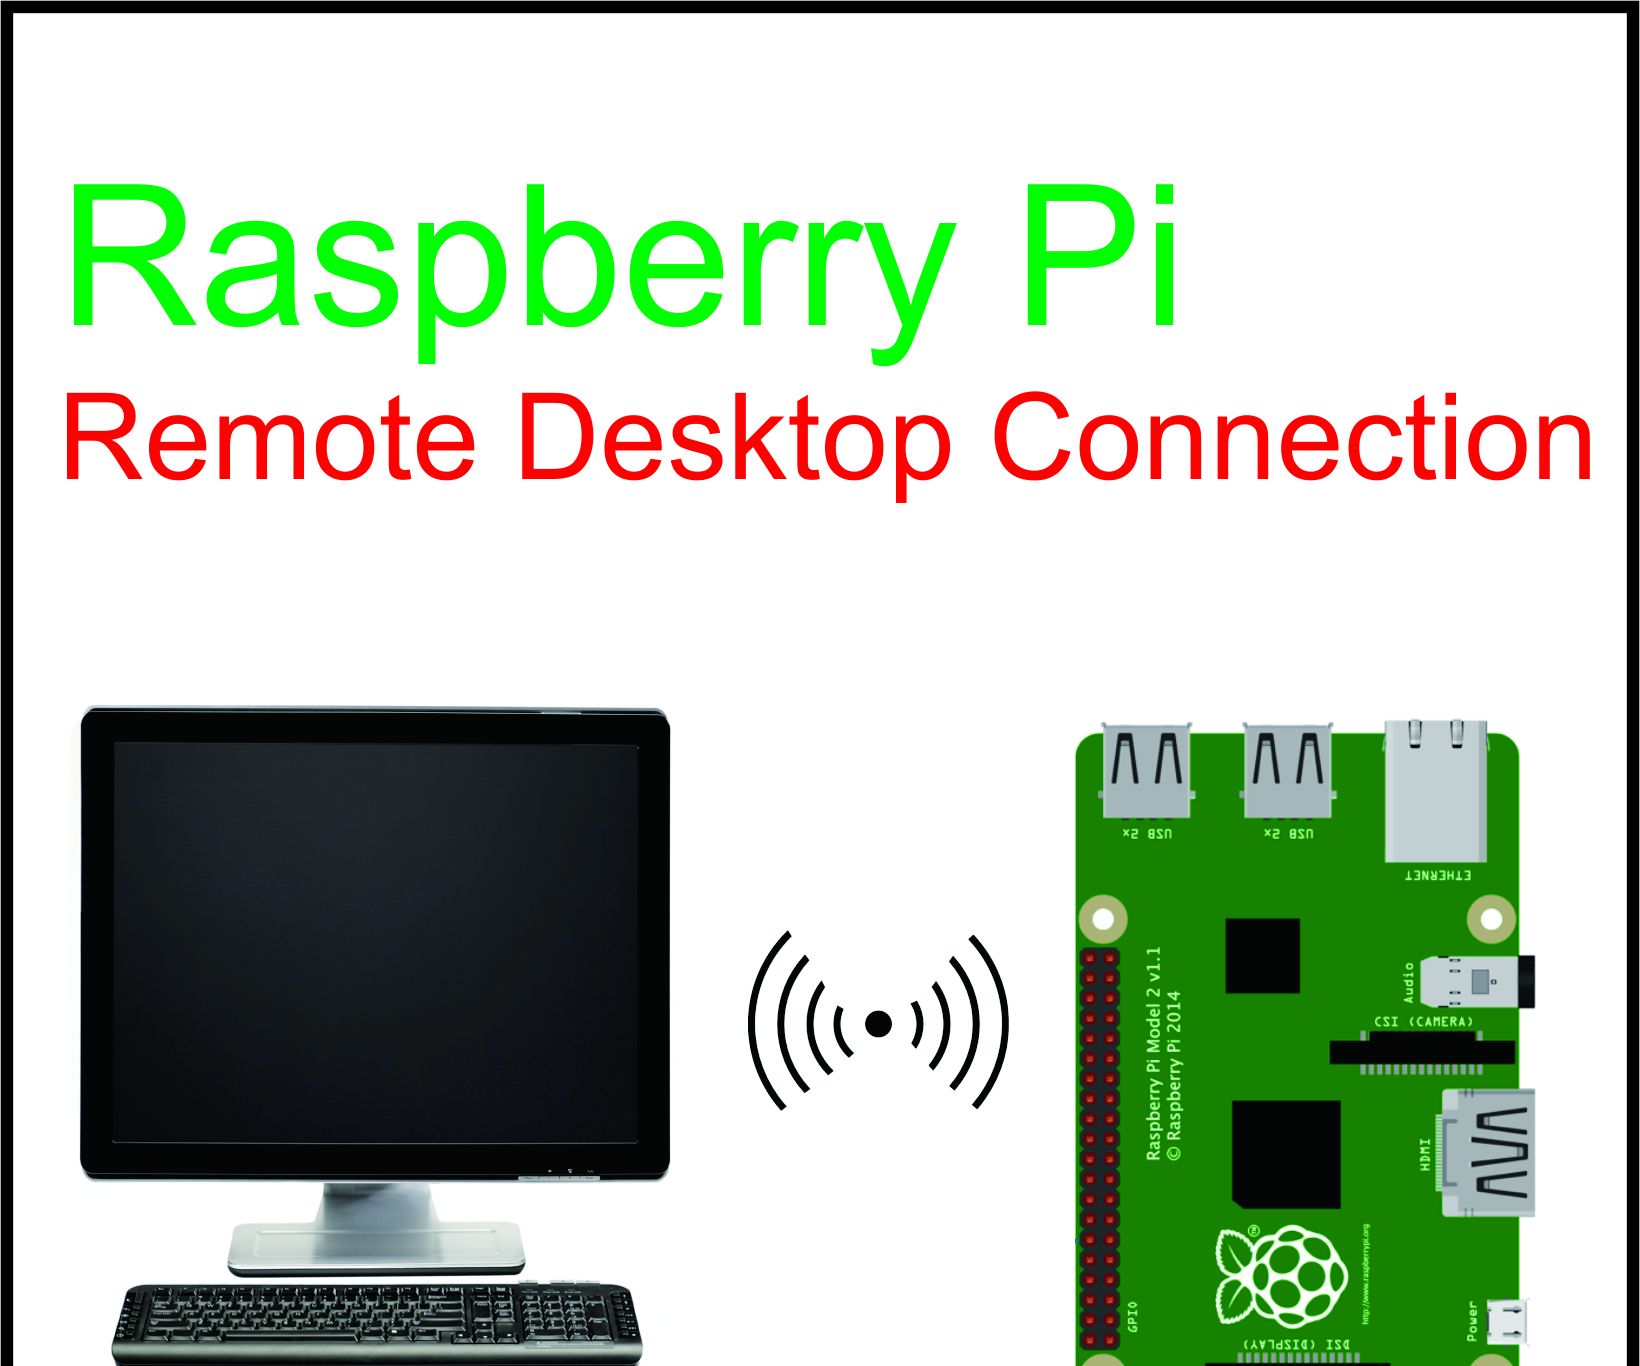
Whether you're a seasoned developer or a curious beginner, understanding how to securely connect to your Raspberry Pi without direct physical access opens up a world of possibilities for projects, home automation, and server management. This comprehensive guide aims to demystify the process, offering a clear, step-by-step approach to leveraging RemoteIoT for unparalleled remote control. By mastering this guide, anyone can get great remote Raspberry Pi desktop access from anywhere via SSH or VNC over the internet, and then use a VNC client to control that tiny computer from afar, even when it's behind a firewall or NAT router.
Table of Contents
- The Growing Need for Remote Raspberry Pi Access
- Understanding RemoteIoT: Your Bridge to Seamless Connectivity
- Preparing Your Raspberry Pi for Remote Access
- Securely Setting Up RemoteIoT on Your Raspberry Pi
- Mastering Remote Control: SSH and VNC with RemoteIoT
- Overcoming Network Challenges: Firewalls and NAT
- Advanced RemoteIoT Features and Applications
- Troubleshooting Common Remote Access Issues
- Conclusion: Unlocking Your IoT Potential
The Growing Need for Remote Raspberry Pi Access
The Raspberry Pi, with its compact size, affordability, and versatility, has become a cornerstone for countless IoT projects, home automation systems, and even small-scale servers. However, the true power of these devices is often unlocked when they can be managed and monitored from a distance. Imagine deploying a Raspberry Pi as a sensor node in a remote location, or as a home automation hub in a hard-to-reach cupboard. Without remote access, every configuration change, every software update, or every troubleshooting step would require physical intervention, which is often impractical or impossible.
As more people embrace the internet of things, the demand for seamless and secure remote device management solutions has skyrocketed. Remote access to your Raspberry Pi is a crucial skill for anyone involved in IoT projects. Whether you're a hobbyist experimenting with new ideas, a developer deploying prototypes, or an administrator managing a fleet of devices, the ability to connect to your Pi from anywhere in the world is invaluable. This capability allows for continuous monitoring, immediate problem-solving, and efficient deployment of updates, significantly enhancing the operational efficiency of your IoT ecosystem. By following the steps outlined in this tutorial, you can securely connect to your Raspberry Pi from anywhere in the world, transforming how you interact with your embedded systems.
Understanding RemoteIoT: Your Bridge to Seamless Connectivity
Before diving into the practical steps of this remotely access Raspberry Pi RemoteIoT tutorial, it's essential to grasp what RemoteIoT is and why it stands out as a powerful solution. Raspberry Pi RemoteIoT is a software framework designed specifically for Raspberry Pi devices to enable seamless IoT connectivity. Think of it as the bridge that connects your Raspberry Pi to the internet, providing a secure and efficient channel for remote management.
Unlike traditional methods that often involve complex network configurations, port forwarding, or setting up VPNs manually, RemoteIoT simplifies the entire process. Its core strength lies in its ability to facilitate direct, secure connections to your Raspberry Pi, even when it's located behind firewalls or NAT routers, without needing to expose sensitive ports to the open internet. This is a significant advantage for both security and ease of use. With the RemoteIoT service, you may manage thousands of devices at the same time including monitoring CPU, memory and network usage, performing any actions and running batch jobs on devices. This scalability makes RemoteIoT an ideal choice for both individual enthusiasts and large-scale industrial IoT deployments, offering a centralized platform for comprehensive device oversight and control.
Preparing Your Raspberry Pi for Remote Access
Before you can leverage the power of RemoteIoT, your Raspberry Pi needs to be set up correctly. This foundational step ensures that your device is ready to communicate and receive commands remotely. This tutorial will cover everything from the basics of Raspberry Pi configuration to advanced RemoteIoT integration, offering practical tips and troubleshooting advice along the way.
Install Raspberry Pi OS: Begin by flashing the latest version of Raspberry Pi OS (formerly Raspbian) onto an SD card. You can use tools like Raspberry Pi Imager for a straightforward process. For headless setups (without a monitor, keyboard, or mouse), ensure you enable SSH during the imaging process or by creating an empty file named `ssh` in the boot partition of the SD card before first boot. This article dives deep into the process of downloading and configuring a Raspberry Pi for remote access without direct peripherals.
Connect to Network: Ensure your Raspberry Pi is connected to your local network, either via Ethernet or Wi-Fi. A stable internet connection is crucial for RemoteIoT to function correctly.
Update and Upgrade: Once booted, open a terminal and run the following commands to ensure all software packages are up to date:
sudo apt update sudo apt full-upgrade -yEnable SSH: SSH (Secure Shell) is fundamental for remote command-line access. While often enabled during OS flashing, you can manually enable it via the Raspberry Pi Configuration tool (`sudo raspi-config`) under 'Interface Options' -> 'SSH'.
Enable VNC (Optional but Recommended for Desktop Access): If you plan to access your Raspberry Pi's graphical desktop remotely, VNC (Virtual Network Computing) is essential. Enable it in `sudo raspi-config` under 'Interface Options' -> 'VNC'. After enabling, install a VNC server if not already present (e.g., `sudo apt install realvnc-vnc-server`).
Set a Strong Password: Change the default password for the `pi` user (or any user you create) to a strong, unique one. This is a critical security measure: `passwd`.
With these preliminary steps completed, your Raspberry Pi is now ready to be integrated with the RemoteIoT service. We’ll cover everything from setting up SSH to downloading RemoteIoT tools and troubleshooting common issues, ensuring a smooth setup experience.
Securely Setting Up RemoteIoT on Your Raspberry Pi
This is the core of our remotely access Raspberry Pi RemoteIoT tutorial. Setting up RemoteIoT involves installing its client on your Raspberry Pi and then configuring it to establish a secure connection to the RemoteIoT cloud service. The beauty of RemoteIoT lies in its ability to create a secure tunnel, allowing you to directly connect to Raspberry Pi behind firewall from anywhere as if it was on the local network, without the complexities of port forwarding or dynamic DNS.
Initial RemoteIoT Tool Download and Configuration
To begin, you'll need to download and install the RemoteIoT agent on your Raspberry Pi. The process is typically straightforward and involves a few command-line steps. First, ensure you have `curl` installed, which is often used for downloading files from the internet:
sudo apt install curl -yNext, you'll download and execute the RemoteIoT installation script. The exact command might vary slightly based on the latest version of RemoteIoT, so it's always best to check the official RemoteIoT documentation for the most up-to-date instructions. However, a typical installation might look like this:
curl -sSfL https://get.remoteiot.com/install.sh | sudo bashThis command downloads the installation script and pipes it directly to `sudo bash`, which executes it with administrative privileges. The script will handle the necessary dependencies and install the RemoteIoT agent on your system. Once installed, you will typically be prompted to link your device to your RemoteIoT account. This usually involves copying a unique device ID or a registration command from your RemoteIoT web dashboard and pasting it into the Raspberry Pi's terminal. This step securely registers your Raspberry Pi with your RemoteIoT account, making it discoverable and manageable through their platform.
Establishing Secure Connections: VPC SSH
One of the standout features of RemoteIoT is its Virtual Private Cloud (VPC) SSH capability. Setting up a RemoteIoT VPC SSH on Raspberry Pi provides an unparalleled level of security and convenience for remote access. Instead of exposing SSH or VNC on your Raspberry Pi over the open internet, within a VPN, or using an external IP, RemoteIoT creates a secure, encrypted tunnel to its cloud infrastructure. This means your Raspberry Pi is never directly exposed to the public internet, significantly reducing its attack surface.
Securely setting up RemoteIoT VPC SSH on Raspberry Pi for free is a comprehensive guide to fortifying your remote connections. Easy steps for secure setup included within the RemoteIoT platform make this process accessible. After the RemoteIoT agent is installed and linked to your account, you can configure VPC SSH directly from the RemoteIoT web dashboard. Here’s a general outline of the process:
Access RemoteIoT Dashboard: Log in to your RemoteIoT account via your web browser.
Select Your Device: Locate your registered Raspberry Pi in the list of devices.
Configure SSH/VNC Access: Within the device settings, you'll find options to enable and configure SSH and VNC access. RemoteIoT typically provides a unique, internal IP address or hostname for your device within its VPC network.
Generate SSH Keys (Recommended): For enhanced security, RemoteIoT often supports SSH key-based authentication. Generate an SSH key pair on your local machine and upload your public key to your RemoteIoT account. This eliminates the need for password-based authentication, which is more vulnerable to brute-force attacks.
Connect: RemoteIoT will provide you with a specific command or a generated SSH configuration snippet that you can use from your local machine's terminal to connect to your Raspberry Pi. This command will typically route your SSH connection through the secure RemoteIoT tunnel.
This method ensures that all communication between your local machine and your Raspberry Pi is encrypted and routed through a secure, private network, making it highly resistant to eavesdropping and unauthorized access. Remotely accessing a Raspberry Pi using RemoteIoT free is an increasingly popular solution for managing IoT devices and servers remotely, whether you're a hobbyist, developer, or managing a fleet of devices.
Mastering Remote Control: SSH and VNC with RemoteIoT
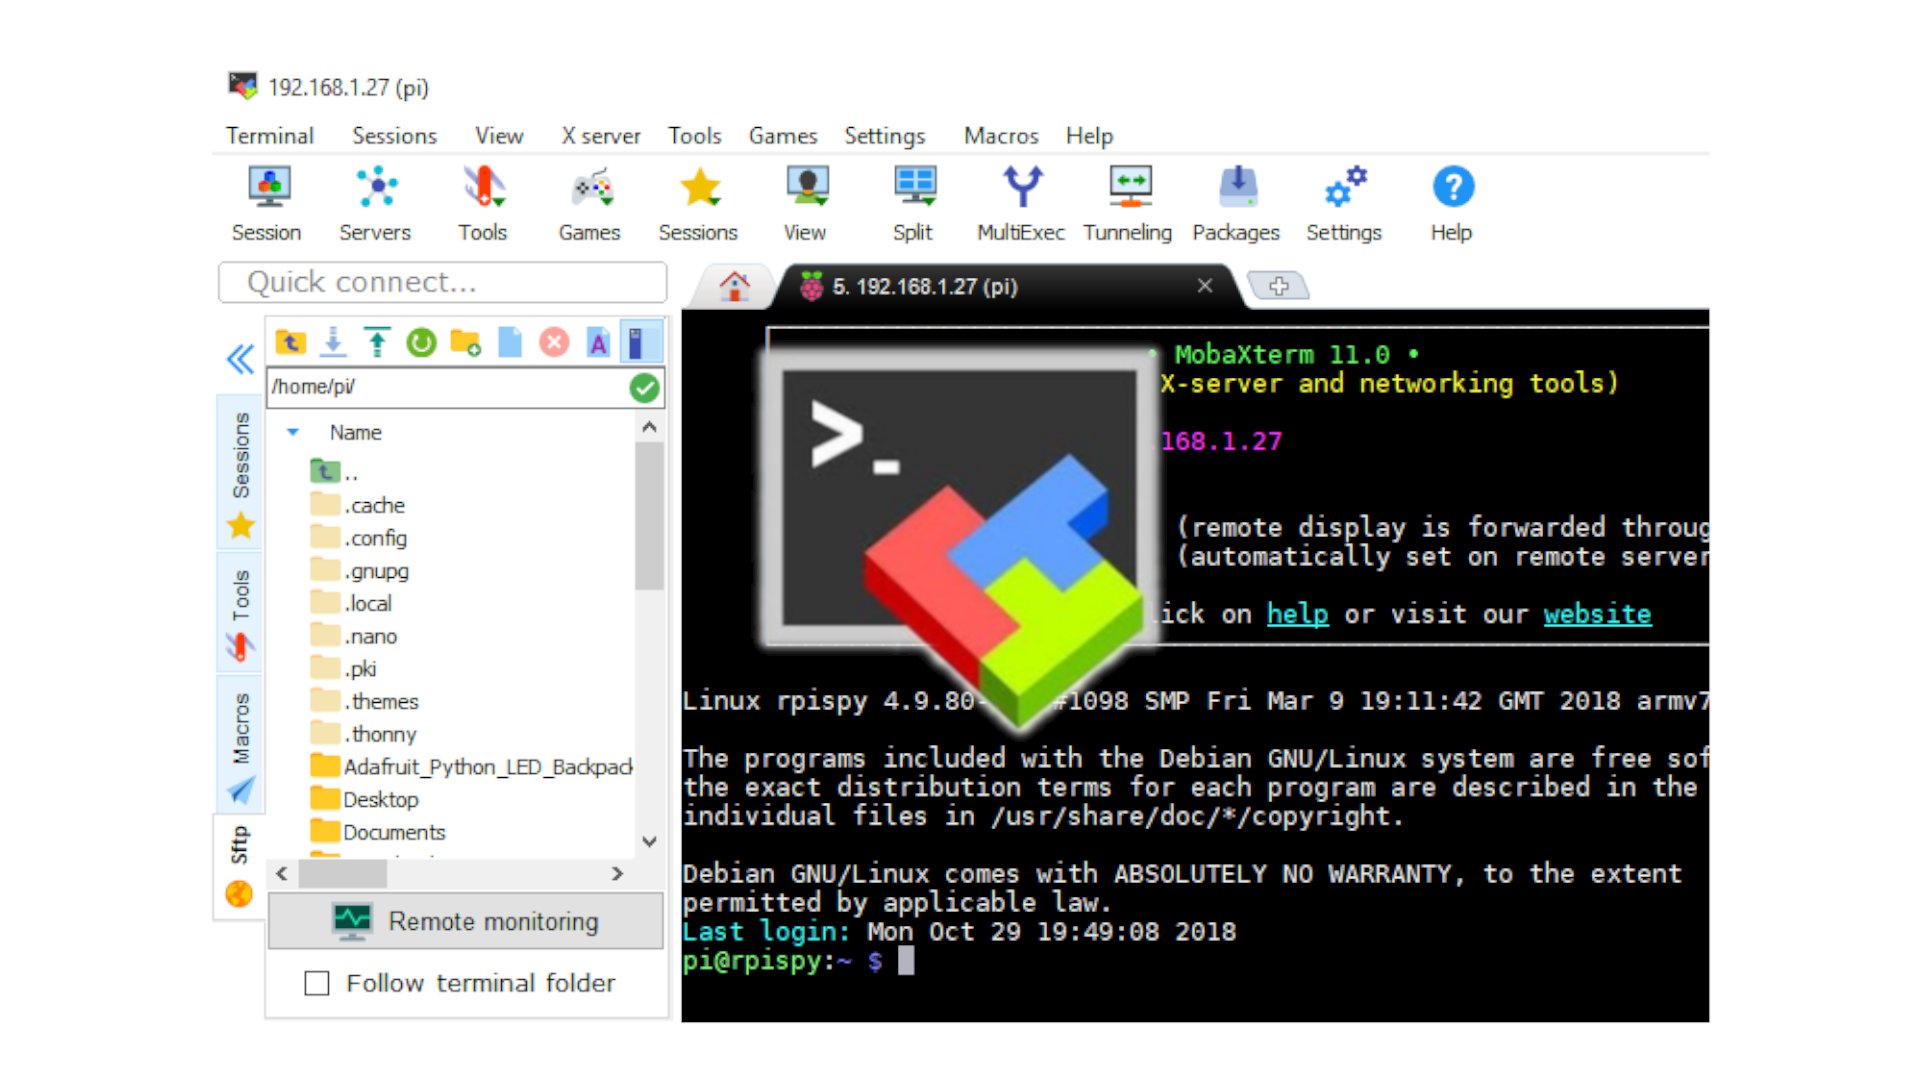
Once your RemoteIoT setup is complete, you gain the power to remotely control your Raspberry Pi from any device connected to the internet. This capability extends to both command-line operations via SSH and graphical desktop interactions through VNC, offering flexibility based on your needs.
Command-Line Control via SSH
SSH is the workhorse for remote server management, and with RemoteIoT, it becomes even more accessible and secure. To remotely control your Raspberry Pi from any device connected to the internet, you can simply open your terminal (on Linux/macOS) or use an SSH client like PuTTY (on Windows) and use the connection details provided by RemoteIoT. The command will typically look something like this:
ssh -p <RemoteIoT_Port> pi@<RemoteIoT_Hostname_or_IP>Where `<RemoteIoT_Port>` and `<RemoteIoT_Hostname_or_IP>` are specific to your device and provided by the RemoteIoT dashboard. Once connected, you'll have full command-line access to your Raspberry Pi, allowing you to:
- Install and update software packages (`sudo apt update`, `sudo apt install`).
- Manage files and directories (`ls`, `cd`, `cp`, `rm`).
- Run Python scripts or other applications.
- Monitor system resources (`top`, `htop`, `df`).
- Send command and batch job to your Raspberry Pi, automating tasks across multiple devices if needed.
This level of control is indispensable for headless setups or for managing IoT devices that don't require a graphical interface. By mastering this guide, anyone can get great remote Raspberry Pi desktop access from anywhere via SSH or VNC over the internet, and then use a VNC client to control that tiny computer from afar.
Graphical Desktop Access with VNC
For tasks that require a visual interface, such as configuring graphical applications, browsing the web on your Pi, or developing with a GUI-based IDE, VNC is the preferred method. With RemoteIoT, connecting to your Raspberry Pi's desktop is as secure and straightforward as SSH.
After enabling VNC on your Raspberry Pi (as covered in the preparation section) and configuring it within your RemoteIoT dashboard, you'll need a VNC client on your local machine (e.g., RealVNC Viewer, TightVNC, or Remmina). RemoteIoT will provide you with the specific VNC connection details, often including an address and port that tunnel through their secure service. You simply enter these details into your VNC client, and after a successful connection, you'll see your Raspberry Pi's desktop environment appear on your screen, ready for interaction.
This seamless graphical access means you can perform any task that would normally require a monitor, keyboard, and mouse, all from the comfort of your remote location. Whether you're managing home automation systems, running servers, or developing IoT applications, knowing how to remotely access Raspberry Pi can significantly enhance your workflow and productivity.
Overcoming Network Challenges: Firewalls and NAT
One of the most common hurdles in setting up remote access to devices like the Raspberry Pi is dealing with network complexities such as firewalls and Network Address Translation (NAT) routers. Traditionally, to access a device behind these barriers, you would need to configure port forwarding on your router, which can be cumbersome, insecure if not done correctly, and often impossible in corporate or public networks where you don't control the router.
This is where RemoteIoT truly shines. It provides an elegant solution to remotely access Raspberry Pi behind firewall or NAT router without any manual port forwarding. Instead of waiting for incoming connections, the RemoteIoT agent on your Raspberry Pi establishes an outbound connection to the RemoteIoT cloud service. This "reverse tunnel" or "hole punching" technique allows the RemoteIoT service to act as an intermediary, routing your remote access requests (SSH, VNC, etc.) through this established outbound tunnel.
The result is that you can directly connect to Raspberry Pi behind firewall from anywhere as if it was on the local network. This eliminates the need for public IP addresses, dynamic DNS services, or complex router configurations, making remote access significantly easier and more secure. This capability is particularly beneficial for IoT deployments in diverse network environments, ensuring consistent and reliable connectivity regardless of the underlying network infrastructure.
Advanced RemoteIoT Features and Applications
Beyond basic SSH and VNC access, RemoteIoT offers a suite of advanced features that elevate it from a simple remote access tool to a comprehensive IoT device management platform. These capabilities are designed to streamline the management of single devices or even thousands of Raspberry Pis, making it an indispensable tool for serious IoT projects.
Comprehensive Device Monitoring: With the RemoteIoT service, you may manage thousands of devices at the same time including monitoring CPU, memory and network usage. This real-time telemetry allows you to keep a close eye on the health and performance of your Raspberry Pis, identifying potential issues before they become critical. You can track resource consumption, network activity, and even custom sensor data, all from a centralized dashboard.
Performing Any Actions and Running Batch Jobs on Devices: The ability to send command and batch job to multiple Raspberry Pis simultaneously is a game-changer for large-scale deployments. Whether it's deploying a software update, restarting a service, or executing a custom script, RemoteIoT allows you to perform these actions across your entire fleet with a few clicks. This automation capability saves immense time and ensures consistency across your devices.
Secure File Transfer: Beyond commands, RemoteIoT often provides secure mechanisms for transferring files to and from your Raspberry Pi. This is crucial for deploying new application versions, retrieving log files, or updating configuration files remotely.
API Integration: For developers looking to integrate RemoteIoT's capabilities into their own applications or dashboards, many services offer robust APIs. This allows for programmatic control and monitoring of your Raspberry Pis, enabling custom IoT solutions and deeper automation.
Creating Powerful IoT Solutions: In this comprehensive guide, we have explored how to set up and use Raspberry Pi with RemoteIoT to create powerful IoT solutions. From smart home automation to industrial monitoring systems, the combination of Raspberry Pi's versatility and RemoteIoT's robust remote management features opens up a world of possibilities. You can build resilient, scalable, and easily manageable IoT ecosystems, leveraging the full potential of your connected devices.
Remotely accessing Raspberry Pi opens up a world of possibilities for RemoteIoT projects. By following the steps in this tutorial, you’ll be able to securely connect to your Pi from anywhere, transforming your approach to IoT development and deployment.
Troubleshooting Common Remote Access Issues
Even with the most straightforward setup, you might encounter issues when attempting to remotely access your Raspberry Pi. Here are some common problems and their solutions, designed to help you troubleshoot effectively and ensure a smooth experience with this remotely access Raspberry Pi RemoteIoT tutorial.
No Connection to RemoteIoT Service:
- Check Internet Connection: Ensure your Raspberry Pi has a stable internet connection. Try pinging a public website (e.g., `ping google.com`) from the Pi's terminal.
- RemoteIoT Agent Status: Verify that the RemoteIoT agent is running on your Raspberry Pi. Check its service status (e.g., `sudo systemctl status remoteiot-agent`). Restart it if necessary.
- Firewall on Pi: If you've configured a local firewall (like `ufw`) on your Raspberry Pi, ensure it's not blocking outbound connections required by the RemoteIoT agent.
- Account Linking: Double-check that your Raspberry Pi is correctly linked to your RemoteIoT account in the web dashboard.
SSH Connection Refused/Timed Out:
- SSH Server Running: Confirm the SSH server is running on your Raspberry Pi (`sudo systemctl status ssh`). If not, start it (`sudo systemctl start ssh`).
- SSH Enabled: Ensure SSH is enabled in `raspi-config`.
- Correct Credentials: Verify the username and password (or SSH key) you are using are correct.
- RemoteIoT Tunnel: Check the RemoteIoT dashboard to ensure the SSH tunnel for your device is active and configured correctly.
VNC Connection Issues:
- VNC Server Running: Make sure the VNC server is running on your Raspberry Pi (`sudo systemctl status realvnc-vnc-server` or similar).
- VNC Enabled: Confirm VNC is enabled in `raspi-config`.
- Desktop Environment: Ensure your Raspberry Pi is running a graphical desktop environment. VNC needs one to connect to.
- Resolution: Sometimes VNC clients can struggle with very high resolutions. You might need to adjust the VNC resolution settings on your Pi or in your client.
- RemoteIoT Tunnel: As with SSH, confirm the VNC tunnel is active and correctly configured in your RemoteIoT dashboard.
Slow Performance/Lag:
- Internet Bandwidth: Remote access performance is heavily dependent on your internet connection speed (both local and Pi's).
- Pi Resources: Check CPU, memory, and network usage on your Raspberry Pi (via RemoteIoT monitoring or SSH commands like `top` or `htop`). High usage can cause lag.
- VNC Quality: For VNC, reduce the color depth or image quality settings in your VNC client to improve performance over slower connections.
"Permission Denied (publickey)" for SSH:
- This typically means your SSH key is not correctly set up or recognized. Ensure your public key is uploaded to your RemoteIoT account and that your local SSH client is using the correct private key.
- Verify file permissions for your SSH keys (private key should be `600`).
By systematically checking these points, you can often quickly identify and resolve most remote access challenges, allowing you to get back to your IoT projects.
Conclusion: Unlocking Your IoT Potential
In this comprehensive guide, we have explored how to set up and use Raspberry Pi with RemoteIoT to create powerful IoT solutions. From the initial preparation of
How To Remotely Access Raspberry Pi For Remote IoT Projects: The

Remote Access For Raspberry Pi And IoT Devices Free Download: A
Securely Connect RemoteIoT VPC Raspberry Pi: A Comprehensive Guide
